Settings Page
The Settings Page in Rever allows Administrators to configure key parameters that control system behavior, user access, approval flows, and integrations. Proper configuration ensures compliance, smooth workflow, and optimal system performance.
General
The General page allows you to configure your organization’s basic profile details.
Key Fields:
- Organization Name: The official registered name of your company.
- Email ID & Phone Number: Contact details used for system communication.
- Date Format: Select the preferred format (e.g., MM/DD/YYYY).
- Business Type & Industry: Helps categorize your business for reporting.
- Company Address:
- Country
- State
- City
- ZIP Code
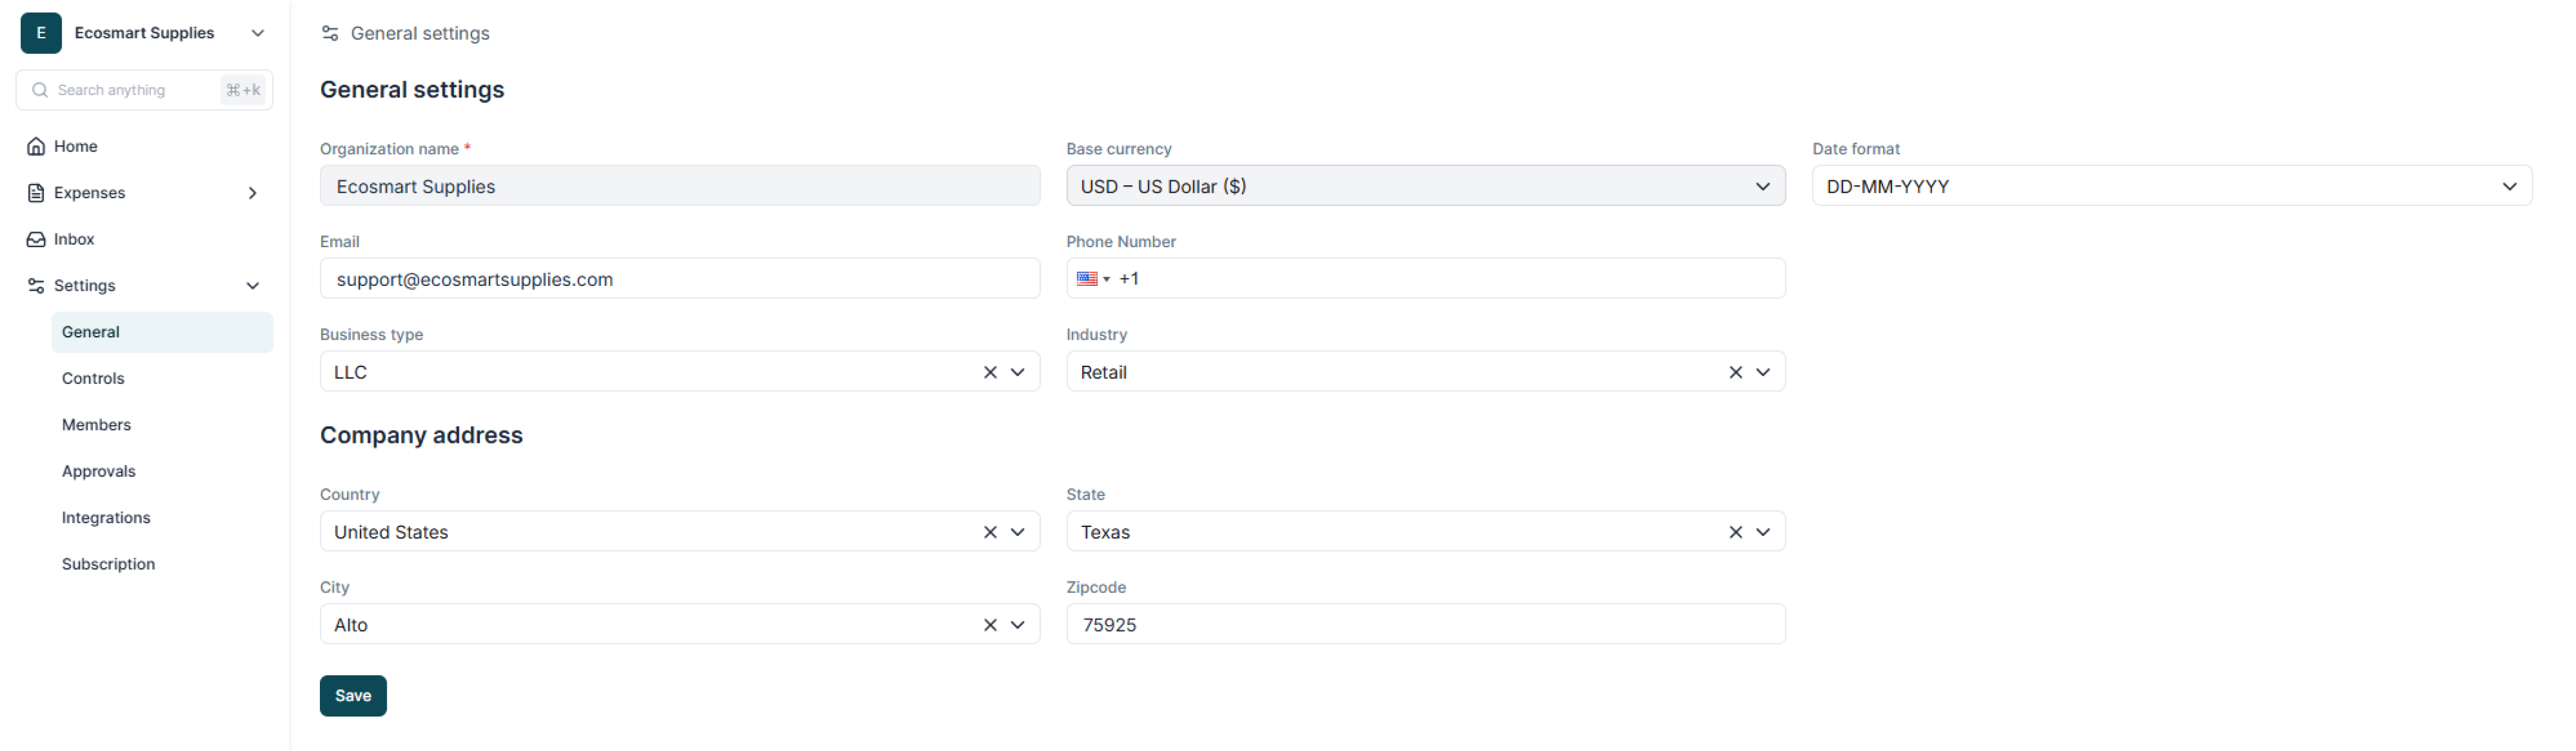
Keep this information updated
Controls
The Controls page allows Administrators to configure the system’s Matching Logic.
Available Options:
- No Matching: Invoices and POs will not be automatically compared. Suitable for very small organizations or manual workflows.
- 2 - Way Matching: System compares PO vs Invoice for key fields like quantity, price, and vendor.
- 3 - Way Matching: System compares PO vs Invoice vs GRN (Goods Receipt Note) to ensure goods/services were received before payment.
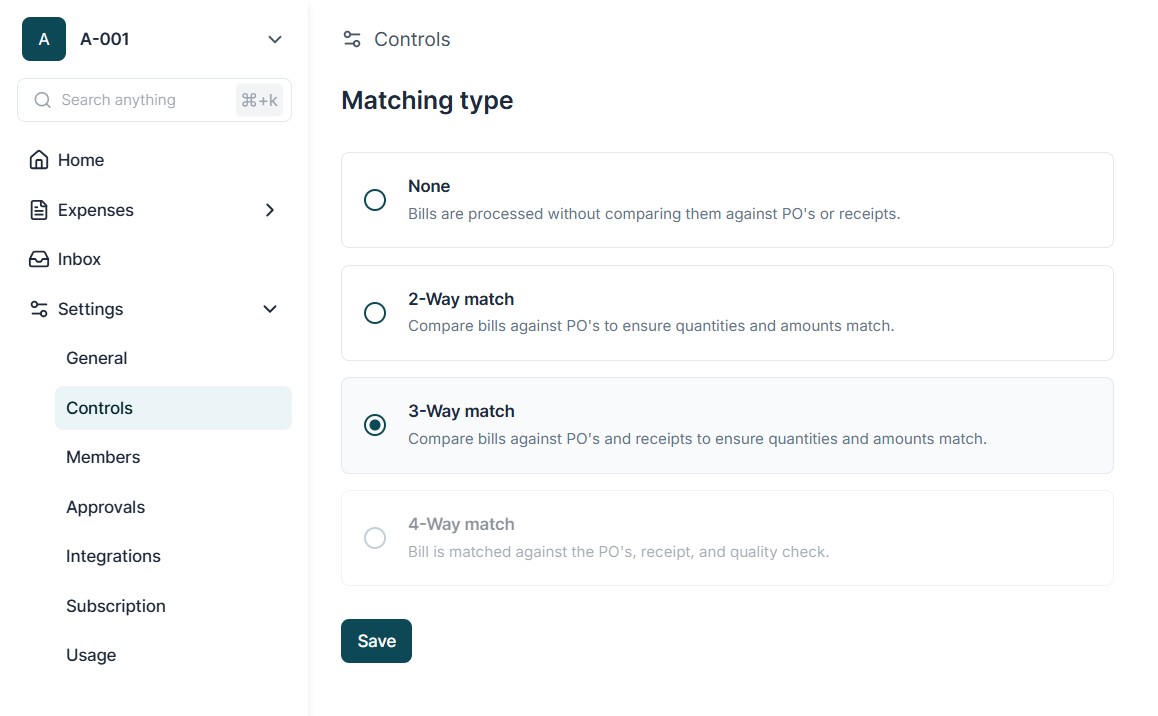
Steps to Configure:
- Navigate to Settings → Controls.
- Select your desired matching type (No Matching, 2-Way, 3-Way).
- Save settings.
- Use 2 - Way Matching for service-only businesses.
- Use 3 - Way Matching for inventory-based businesses where physical goods must be received before payment.
Members
The Members page is used to manage system users and assign them appropriate roles.
Available Actions:
- Invite Users:
- Click Invite User button.
- Enter user’s email address.
- Assign a role (e.g., Member, Approver, AP Clerk, Admin).
- Send invite.
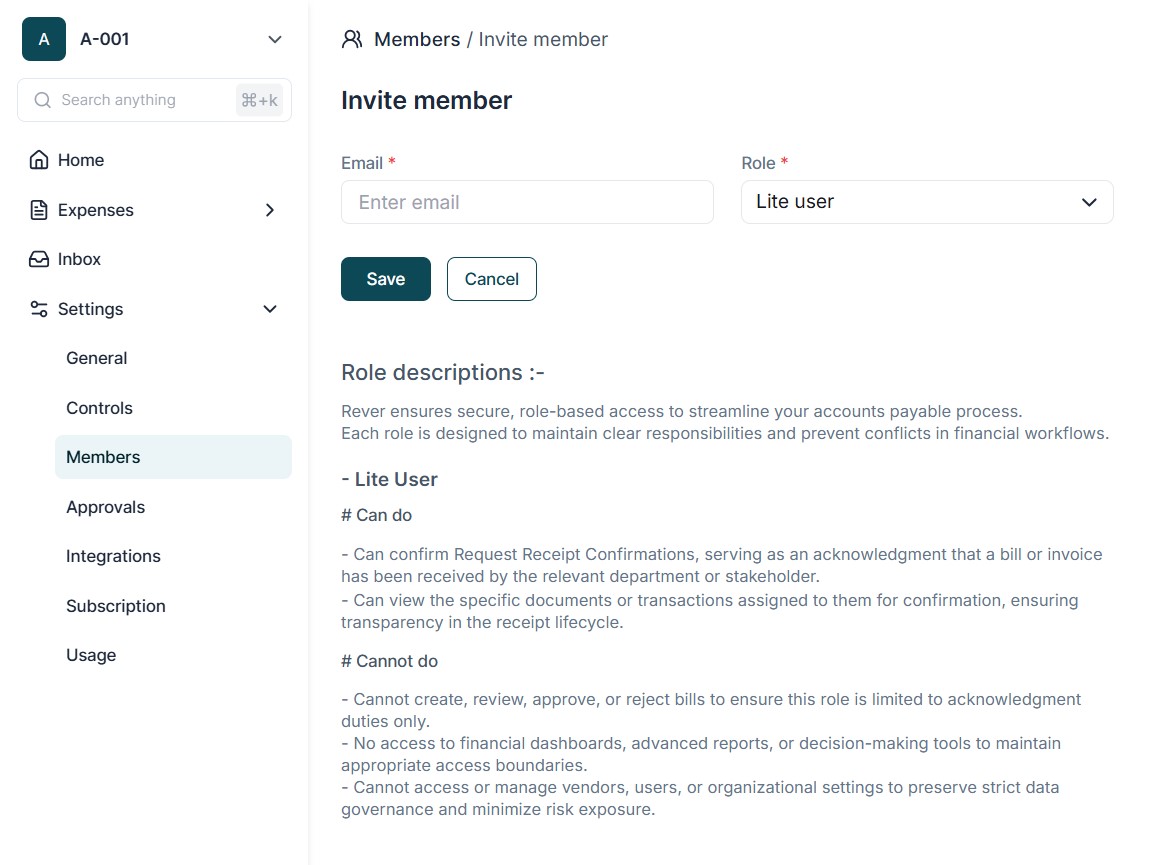
- Assign / Modify Roles: Change roles based on user responsibilities.
- Delete Users: Remove inactive or incorrect users from the system.
- Periodically review user access to maintain compliance.
- Remove users who have left the organization.
Only users with Admin privileges can invite, edit, or delete members.
Approvals
The Approvals page allows setting up multi-level approval hierarchies for POs and Bills.
Key Features:
- Approval Levels: Up to 5 levels (L1–L5).
- Sequential Order: Approvals are routed in order – L1 first, then L2, and so on.
- Separate Setup for PO & Bill: Each can have independent approval workflows.
Steps to Configure:
- Navigate to Settings → Approvals.
- Select either PO Approval Flow or Bill Approval Flow.
- Add approvers for L1 to L5 (as needed).
- Save configuration.
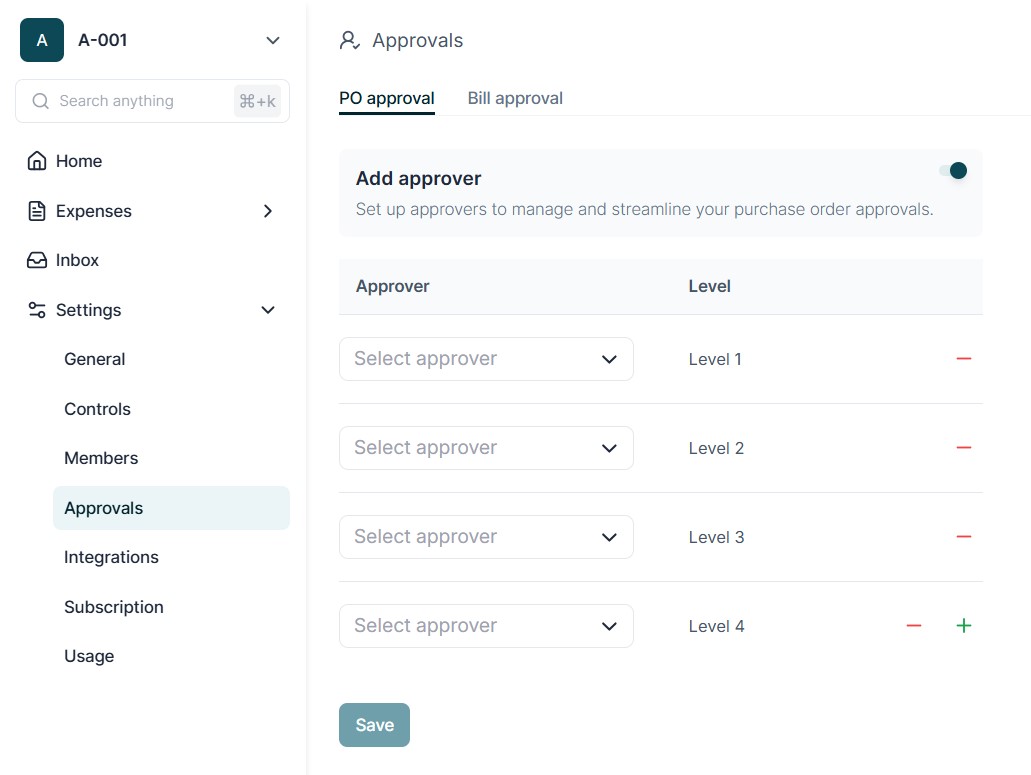
Keep the number of levels minimal to avoid process delays.
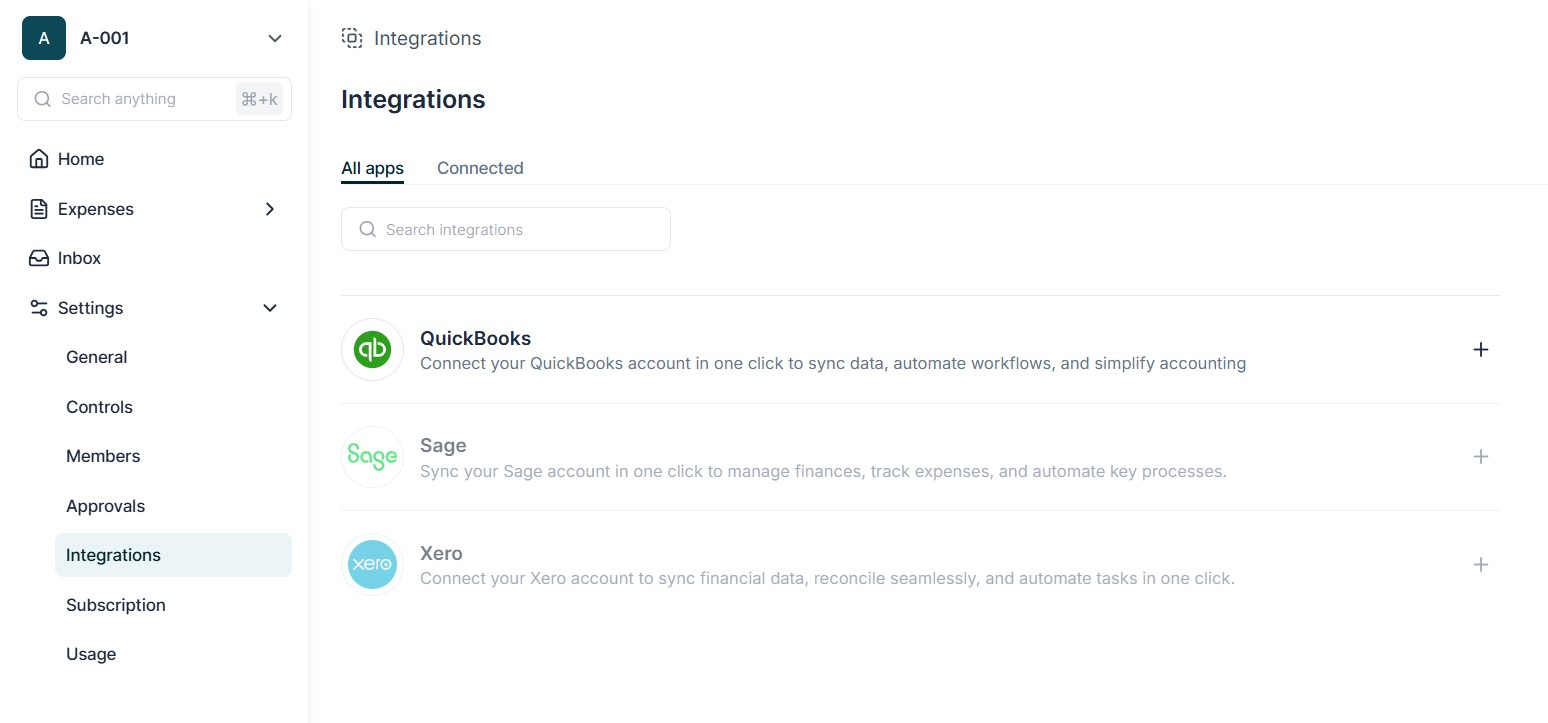
Integrations
The Integrations page allows administrators to connect Rever with third-party applications to ensure smooth data flow between systems.
Navigating the Integration Page
When you open Settings → Integrations you will see two tabs :
-
All Apps:
- Displays all available applications that can be integrated with Rever.
- Each app has a Plus (+) Button beside it.
- Clicking the Plus button starts the integration process.
-
Connected Apps:
- Displays the list of applications already integrated with your Rever account.
- Provides options to manage, disconnect, or re-sync the connected apps.
Connecting QuickBooks
To integrate Rever with QuickBooks:
- Navigate to Settings → Integrations → All Apps
- Locate QuickBooks in the list of available apps.
- Click the Plus (+) Button next to QuickBooks.
- You will be redirected to the QuickBooks Authentication Page.
- Log in using your QuickBooks credentials.
- Authorize Rever to access your QuickBooks company data.
- Once authentication is complete, QuickBooks will appear under Connected Apps.
Syncing Data from QuickBooks
After connecting QuickBooks, follow these steps to sync data:
- On the Connected Apps tab, click the Sync Button next to QuickBooks.
- A Sync Dialog Box will be displayed.
- In the dialog box, you will see two checkboxes:
- Vendors – to sync vendor details
- Chart of Accounts (COA) – to sync expense categories and GL codes
- Select one or both checkboxes depending on your requirement.
- Click Sync Now to begin the synchronization process.
- Wait until the sync completes. The system will display a success confirmation.
Key Benefits of QuickBooks Integration
- Automatic Vendor Sync: Ensures that vendor names and details in Rever match QuickBooks, eliminating manual data entry.
- Chart of Accounts Sync: Keeps all expense categories and GL codes aligned between Rever and QuickBooks for accurate coding.
- Perform Sync Before Creating POs or Bills: This ensures you always use the latest vendor and account data.
- Regular Syncs: Recommended after major vendor or COA changes in QuickBooks.
- Verify Data After Sync: Quickly review new vendors or GL codes for accuracy before using them in live transactions.